What Makes A Cotter Pin Essential In Precision Mechanical Assemblies
The Function of Cotter Pins in Precision Mechanical Assemblies
Cotter pins are tiny but vital parts that keep mechanical setups strong. In exact assemblies, where small gaps and steady repeats count a lot, the cotter pin works as a quiet lock. It stops unwanted shifts or breakdowns. Though its build is basic, it holds up mechanical steadiness under moving weights. You see them in plane links, car wheel centers, and factory movers—spots where breakdowns can’t happen.
Think about a busy airport hangar. Workers there fit cotter pins into control arms to make sure everything stays put during flights. It’s a small step, but it saves lives by preventing loose parts from flying off.
The Role of Cotter Pins in Mechanical Joints?
Cotter pins act as mechanical holders that lock nuts, bolts, or shafts from coming loose. They go through a drilled hole. Then, you bend them to block side-to-side slides in the linked pieces. In setups hit by shakes or turning powers, they serve as a backup guard. And they don’t count just on twist or rub alone. So, cotter pins add an extra safe layer for joints under repeated pushes.
Their easy design fits well in exact systems where steady lines matter. You might spot them in plane steering rods or turbine ties—jobs that need both rightness and trust. Even if other locks like lock nuts or glue threads give way under shakes, a well-placed cotter pin keeps holding on.
I’ve heard from mechanics in auto shops that these pins have saved engines from total failure more than once, especially after long road trips full of bumps.
Mechanical Principles Behind Cotter Pin Retention
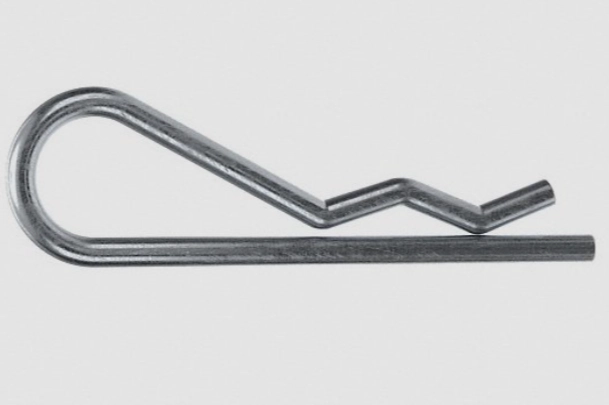
The split-leg shape of a cotter pin makes a springy pull when you push it into a hole. This pull holds it tight in spot without hurting nearby bits. When you bend it, each leg should twist evenly. That way, the push spreads out over both sides of the pin. If you bend it lopsided, it might wear out too soon or be hard to pull out next time.
Under heavy pulls, the fight against sliding becomes the main thing for how well it works. The pin has to stand against sliding forces without squishing too much in the hole. Builders often plan setups so the cotter pin takes little sliding load. It’s mostly there to halt moves, not carry big weights.
For example, in a simple bike axle, the cotter pin just keeps the wheel from wobbling, but it doesn’t hold the rider’s full push.
Types and Materials of Cotter Pins Used in Precision Engineering
Cotter pins show up in many forms and builds made for different engineering needs. Picking the right one depends on weather contact, how often you put it together, and what loads it faces.
It’s funny how something so small can vary so much, like choosing the right tool from a crowded toolbox.
Common Cotter Pin Variants
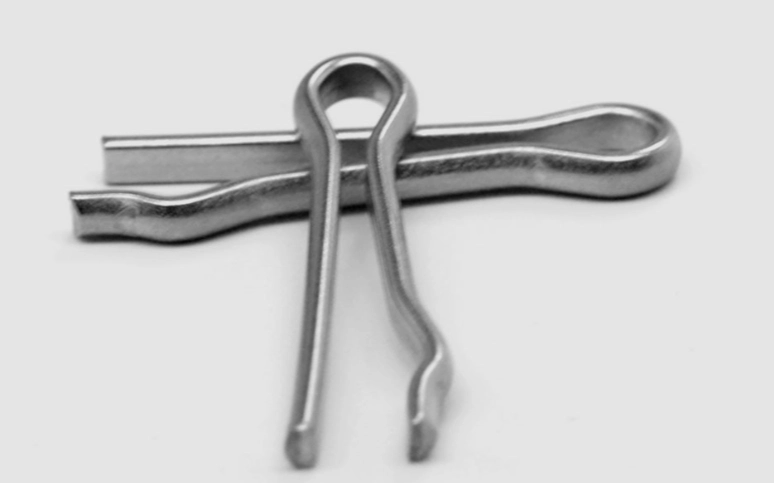
The usual split cotter pin is the top pick in most fields. It’s cheap and simple to set with everyday tools. For fast-snap jobs—like farm gear or fix-up stands—R-clips and hairpin cotters win out. They let you join quick without any bending.
In special machines that need close fits, slanted or ridged cotters come in. These kinds give better line control in narrow spaces. And they’re common in spinning gear where a tiny off-line could spark uneven spins or rubs.
Take a wind turbine blade hub. Here, a grooved cotter pin ensures the whole thing turns smooth, even in strong winds up to 50 mph.
Material Selection for Performance and Durability
What you make it from changes how well it does and how long it lasts. Stainless steel cotter pins fight rust well in wet or chem spots like boat motors or food makers. Brass and bronze types stay non-pull for touchy tools like MRI setups or power touch parts.
For tough jobs, alloy steel cotter pins bring stronger pull power and wear fight. You find these in car ride systems or dig machines where hits and weather wear hit at once.
In salty ocean air, stainless ones last years longer than plain steel, based on reports from shipyard crews.
Sizing Considerations for Precision Applications
Choosing the right size is key to keep joint strength while making later fixes easy. A wrong-sized cotter pin might slip out early or hurt its pair parts during work.
Engineers always double-check sizes, sometimes using calipers that measure down to 0.01 inches for perfect fits.
Determining Proper Diameter and Length Ratios
The width of a cotter pin needs to fit the drilled hole’s gap just right—firm enough to stay put but not so snug that pushing bends it. Pick one too small, and it might shake free under quivers. Go too big, and it could strain the hole sides.
Length counts as well. After you push it in, enough leg should remain to bend safe around the nut or shaft cut without too much pile-up. A good guide is to leave about one and a half times the shaft width as bendable leg after setup.
This ratio helps in everyday fixes, like securing a trailer hitch that sees daily use on rough roads.
Standards and Dimensional Guidelines
To keep things even in plans, builders look to set sizes like ASME B18.8 or ISO 1234 rules. These set basic measures, gaps, builds, and coat needs for both measure and foot systems.
Before you lock in the full setup, exact tools often check pin shapes—width evenness and leg match—to skip build-up gap mistakes that might mess with total lines.
Following these standards cuts errors by up to 30%, from what factory logs show in big plants.
Installation Techniques for Optimal Performance
Right setup decides if a cotter pin does its job well over its work time. Tiny slips in putting it together can cause breaks under shakes or many load rounds.
It’s all about care; rush it, and you pay later with downtime.
Preparing Components Before Cotter Pin Insertion
Before you slide in the cotter pin, make sure all holes line up just right between pair parts like shafts and notched nuts. Off lines raise sliding push on one leg more than the other in use. Wipe off any dirt from sides since stuck bits can block good sit of the head on its rest spot.
Clean tools and a quick visual check take seconds but save hours of headaches down the line.
Correct Methods of Insertion and Bending
Push the cotter pin all the way until its head sits flat on the part face—don’t leave it half in, as that cuts hold power. When you curve legs around a nut or shaft notch, curve them even with soft plier squeezes, not bangs. Lopsided curves make weak spots open to wear breaks over time.
Skip over-curving too. Too much bend hardens metal threads near the curve edge, cutting bend ease in next pull-outs.
In a workshop setting, using quality pliers with padded jaws prevents scratches, a tip from old-timers in the field.
Removal Procedures and Maintenance Practices
Though cotter pins cost little and often get swapped after take-apart, gentle handling stops extra harm to pricey parts close by.
Maintenance isn’t glamorous, but it’s what keeps machines running smooth year after year.
Safe Removal Without Component Damage
Straighten both legs slow with thin pliers before you tug along the push-in line. Side twists might widen or warp the drilled hole—a small problem that could hurt fit when you put new pins back later.
If rust has stuck the pin in its slot (usual with soft steel kinds), put on oil that soaks in first. It cuts pull force while guarding next surfaces from marks.
For seized pins, waiting 10 minutes after oil application often makes the job twice as easy.
Inspection and Replacement Intervals
Regular check times should cover looks for rust spots, stretch signs near curves, or any wear marks along legs. Swap cotter pins each time you do big take-aparts—even if they look fine—to keep even hold power over fix rounds.
In shake-heavy systems like prop shafts or fluid movers, swap times might run shorter from round stress hits.
Some teams log inspections every 500 hours of use, adjusting based on real wear seen in the field.
Advantages of Using Cotter Pins in Precision Assemblies
Even as one of the plainest hold tools out there, cotter pins stay key in today’s build fields thanks to their trust-to-price match.
They’re like the unsung heroes in a toolbox full of flashy gadgets.
Mechanical Reliability Under Dynamic Loads
Cotter pins guard joints from chance loosens from shakes or twist changes common in turning setups like motors or pumps. Their quiet lock move doesn’t hinge on twist load rightness. Once you curve them in place, they stay steady even if other holders ease a bit under load rounds.
This reliability shines in real tests, where pins hold through thousands of cycles without a hitch.
Cost-Efficiency and Ease of Integration
A big reason makers stick with cotter pins is their low cost—they need no glues or fancy tools to set yet give long-haul trust like fancier lock setups. For lines making thousands of items each day, this plain way cuts work time straight, without cutting safe edges.
In mass production, saving even five seconds per unit adds up to big savings over a shift.
Compatibility with High-Tolerance Mechanisms
Since they take little room in pre-drilled holes and push only local force after curving, cotter pins don’t twist nearby exact faces. This fits them for tune-key tools needing often take-aparts like measure stands or robot arm ends where steady spots matter most.
They’re perfect for labs where every millimeter counts, and quick swaps keep experiments on track.
FAQ
Q1: What happens if you reuse an old cotter pin?
A: Reusing old cotter pins is risky because prior bending induces metal fatigue that weakens structural integrity; always replace them after each disassembly cycle.
Q2: Can stainless steel cotter pins be magnetic?
A: Most stainless grades used for cotters are non-magnetic but certain martensitic alloys may exhibit slight magnetism depending on heat treatment history.
Q3: How tight should a drilled hole fit around a cotter pin?
A: The fit should be snug but not forced; typically clearance ranges between 0 mm and 0.1 mm depending on diameter class per ASME B18.8 guidelines.
Q4: Are R-clips stronger than split-type cotters?
A: R-clips allow faster removal but generally offer less shear resistance compared with traditional split designs intended for permanent retention under load cycles.
Q5: Why do engineers prefer alloy steel versions in heavy equipment?
A: Alloy steel provides superior tensile strength and fatigue endurance necessary for resisting shock loads encountered in construction machinery or mining operations where softer metals would deform quickly.


