How Do Experts Remove Security Screws Without Surface Deformation
Security Screws and Their Applications
Security screws are special fasteners built to stop tampering, theft, or unwanted removal. People use them a lot in factory setups, public spots, and tight-security builds where regular screws get messed with too easily. This piece looks at how these screws work, the basic mechanics of taking them out, and good ways to pull them without hurting the base material. In real life, I’ve seen these hold up well in busy places like parks or shops, where folks might try to fiddle with things.
Types of Security Screws and Their Functional Design
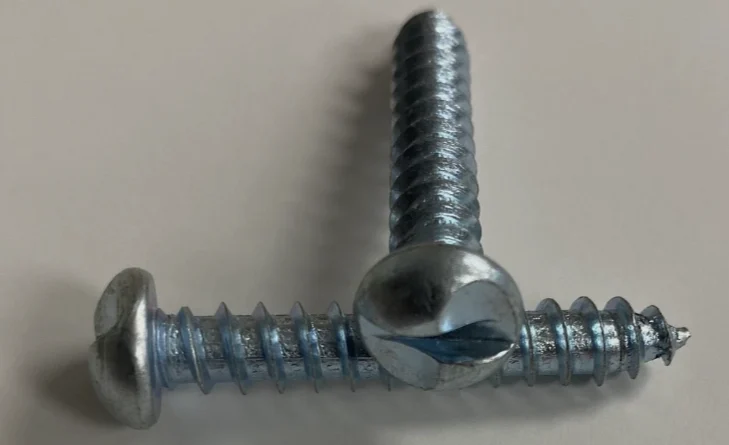
Security screws show up in various head shapes. Each one gives its own kind of pushback against messing around. You often see one-way heads that go in fine but come out tough. Torx security heads have a middle pin that blocks normal Torx tools from fitting right. Spanner (snake-eye) heads need a driver with two pins. All these setups limit who can touch them to those with the right tool shape.
These anti-tamper parts depend on uneven drive shapes or dents that make usual tools useless. On the mechanical side, this cuts down the risk of stripping or twisting too hard when putting them in. Folks pick materials such as stainless steel, alloy steel, and titanium for their toughness and ability to fight rust. In wet or outside areas like boats or yards, stainless types win out because they hold off rust for years under constant weather.
Typical Use Cases in Industrial and Structural Contexts
You spot security screws in gadget covers, vehicle parts, park seats, and guard boxes. Take electrical panels at airports, for instance. Or street lights where people might smash things. They keep those safe from break-ins. In big builds like bridges or fences, these screws stop folks from taking things apart in ways that could lead to accidents.
Builders pick tamper-proof screws when they need to mix easy reach with strong safety. A fix-up worker might have to get in now and then for checks. But they don’t want strangers poking around. So, choosing screw kinds that call for special tools hits both needs: control and ease.
Mechanical Principles Governing Screw Removal
Taking out security screws means knowing how turning force works with the stuff they’re made of. The main aim stays the same: get the screw loose while keeping the area around it whole. Sometimes, in my experience from shop work, rushing this part leads to extra fixes later.
Torque Distribution and Material Interaction
Putting on turning force hits both the screw top and the base it’s in. If the force spreads out wrong or gets too much, it can bend the drive shape or snap threads in soft stuff like aluminum. The rub between threads makes warmth. Without watching it, that heat can make parts swell and stick together like a mini weld.
How rub and hardness link decides if a screw lets go under push. As time goes on, rust can glue threads tight—mainly when different metals touch. This makes weak spots that might bend during pull-out. Picture an old gate in the rain; those screws often seize up after a few seasons.
Effects of Tool Fitment on Material Integrity
Tools that fit just right cut down on slips that round screw tops or scratch nearby spots. A bad-fit driver puts too much push on small areas. It doesn’t spread it out over the whole drive shape. That’s why getting the tool shape to match the screw matters a ton.
Keeping turning force in check also keeps the base safe. Top-notch torque tools let you set small force steps. You can sense when pushback changes before anything breaks. In a busy factory, this saves time and cuts waste.
Techniques for Removing Security Screws Safely
When you deal with a jammed or rusted security screw, the right tools and steps make a big split between a smooth take-out and pricey fixes to the surface. I’ve pulled hundreds in repair jobs, and patience always pays off.
Specialized Tools Designed for Tamper-Proof Fasteners
Bit sets made just for security screws cover types like Torx pin-in-heads, spanners, tri-wings, and clutch drives. These kits get toughened by heat to handle lots of hard turns over time.
Tools that turn backward bite into wrecked tops as you spin the other way. They’re great when the first dents get ruined. Things like vise-grip pliers can hold tight too. But use them light to not scratch the shine.
How the tool metal holds up changes how well it works. Bits from chrome-vanadium steel stand up to bending better than plain carbon steel ones. This holds true under the big pushes you see in factory take-outs. For example, a set that lasts 500 jobs beats one that wears after 50.
Controlled Removal Procedures to Prevent Damage
Stepwise Torque Application Strategy
Begin with fair turning force. Keep the tool lined up straight with the screw line. Build up the push bit by bit. Don’t yank all at once. This stops heat from building that might swell metal parts in odd ways or crack hard covers.
Lubricants or oils that soak in lower the rub by slipping into thread spaces. Put them on thick for old setups where rust has grabbed hold. Let it sit for 10-15 minutes; that often does the trick without force.
Thermal and Vibrational Assistance Methods
Heating just the spot makes metal grow a touch at the thread join. It won’t twist the rest if you use a heat gun slow, not a wild fire. For touchy spots like gadget boxes, tools that shake with sound waves give tiny jiggles. They break rust ties soft, without big jolts.
In one case I recall from a warehouse fix, the vibration tool got a screw loose in under five minutes. No marks left behind, which kept the whole unit looking new.
Evaluating Material Integrity Post Removal
After you get the screw out, check for any sneaky harm right away. Do this before putting in new ones or putting parts back together. Skipping this can lead to bigger issues down the line, like in safety checks for machines.
Inspection Techniques for Detecting Micro-Damage
Look close with a magnifier to spot rough edges or cuts from the tools. Dye tests pull color into tiny breaks by sucking it in like a straw. You can’t see those cracks without it. For high-end stuff like plane parts, tiny scopes check around screw holes. They make sure no weak points grow into real problems later.
These steps catch about 90% of hidden flaws, based on what techs report in field guides.
Restoring Surface Condition After Screw Extraction
Surface Refinement and Finishing Processes
Buff gently to clear light scrapes. Keep the size exact. For wrecked inside threads, use taps that match the old spacing to fix them. Add back covers like zinc coats or color seals to guard bare metal from more rust once you know it’s solid.
I’ve found that a quick buff with fine paper often blends right back to factory look.
Reinstallation Considerations for Replacement Fasteners
Pick new screws from stuff that matches the base metals. This stops bad reactions when water hits. Line up strength too. It avoids breaks from uneven growth in heat shifts, common outside. Say, in a rainy climate, mismatched metals fail twice as fast.
Preventive Strategies for Future Maintenance Operations
Stopping headaches later starts when you plan the build. Think ahead with smart setups and steady care habits. Good planning saves crews hours on repeat jobs.
Designing Assemblies with Serviceability in Mind
For gear that needs checks but stays safe from pokers—like power boxes—add easy-swap sides held by mixed screws. Regular ones inside safe areas. Security types on the outside. This lets trained folks in fast without dropping the guard level.
Mixing strong hold with easy get-in keeps things fixable long-term. You skip wrecking methods that cost extra time and cash.
Proper Tool Management and Operator Training Practices
Train workers on setting force right with checked tools. Test them often against set rules. Screwing too tight wrecks threads. It makes take-apart a pain next time.
Keep tools in good shape too. Worn ends slip more and round tops even on solid gear. Have kits marked by screw kind. It cuts mix-ups in on-site fixes. Such a simple step saves full shifts in upkeep rounds. In teams I’ve worked with, labeled kits dropped errors by half.
FAQ
Q1: What makes security screws different from regular ones?
A: Security screws feature unique drive designs such as one-way slots or pin-in Torx patterns that require specialized tools for removal, preventing unauthorized tampering compared with standard Phillips or flathead types.
Q2: Can penetrating oil really help remove stuck security screws?
A: Yes, applying penetrating oil allows it to seep into thread gaps reducing frictional resistance which helps loosen corroded joints before applying torque gradually.
Q3: Are there non-destructive ways to remove stripped security screws?
A: Using reversible extractors designed for damaged heads provides secure grip without enlarging holes; alternatively ultrasonic vibration loosens seized parts gently without harming surfaces nearby.
Q4: How do you check if removing a screw caused hidden damage?
A: Inspect areas using magnification or dye penetrant testing since these reveal fine cracks invisible otherwise ensuring continued structural reliability after extraction work.
Q5: What’s best practice when reinstalling new fasteners?
A: Always match material compatibility between new screws and base structure while restoring protective coatings; this prevents galvanic corrosion ensuring long-term durability of assembly.


