
Blacksmith tools for beginners and small workshops
What tools does a blacksmith really need first?
For a beginner or a small workshop, the essential blacksmith tools are a working system, not a long catalog of specialty gear. The first setup needs a controllable heat source, a solid striking surface, a suitable hammer, tongs that hold the stock securely, basic cutting and punching tools, a vise, measuring tools and protective equipment. With those pieces in place, a smith can practice the core forging operations: drawing out, bending, tapering, upsetting, punching, drifting and controlled finishing.
More specialized tools such as hardy tools, swages, fullers, power hammers and belt grinders become useful as the work becomes more specific. They should follow skill development and project needs rather than come before them.
For readers comparing hand tools, shop layout and power equipment, the Tools & Power section covers related workshop topics in more depth. This guide focuses on how blacksmith tools work together, how to prioritize purchases, and which safety details should shape every setup.
The core blacksmith tool set
Most blacksmithing work starts with a small group of tools used again and again. Historical trade references, blacksmithing curricula and practical shop instruction generally point to the same foundation: heat the metal, hold it securely, strike it accurately, support it on a solid mass, and control the shape with simple forming tools.
| Tool | Main purpose | Why it matters first |
|---|---|---|
| Forge | Heats metal to forging temperature | Without controlled heat, steel cannot be shaped efficiently by hand |
| Anvil or anvil substitute | Provides a hard striking surface | Transfers hammer energy into the workpiece |
| Hammer | Moves hot metal | A single well-chosen hammer can teach most basic forging movements |
| Tongs | Grip and position hot stock | Unsafe grip is one of the fastest ways to lose control of hot metal |
| Vise | Clamps work for bending, twisting and filing | Gives control when the anvil is not the right support |
| Chisels, punches and drifts | Cut, pierce and size holes | Expand the range of work beyond simple bends and tapers |
| Measuring tools | Check length, thickness and repeatability | Turn rough forging into consistent workshop practice |
| Personal protective equipment | Protects eyes, hearing, hands and body | Forging involves heat, scale, sparks, noise and flying particles |
That list is intentionally short. A beginner does not need every hammer shape, tong pattern or hardy tool on day one. In many shops, the better path is to build a dependable core setup first, then make or add specialty tools when the work calls for them.
Forge choices and heat control
The forge is the heat source. It may be fueled by propane, coal, coke or charcoal, depending on local availability, ventilation, workspace rules and the type of work being done. Propane forges are common in small modern workshops because they are relatively clean, compact and predictable. Solid-fuel forges offer a different kind of heat control and remain important in traditional shops, but they require close attention to fire management, fuel quality, smoke, clinker and local restrictions.
The practical question is not which forge is universally better. It is whether the forge can heat the stock size you actually intend to work, maintain a controllable fire or chamber temperature, and fit the shop safely. A forge used for small hooks, punches and decorative work does not need the same capacity as one used for large architectural ironwork. Oversizing the forge wastes fuel and can make a small workspace harder to manage.
What to look for in a first forge
- Usable heat zone: The hot area should match the length and thickness of the workpiece.
- Access: Openings should allow the stock to enter and rotate without awkward body position.
- Ventilation: Combustion gases, smoke and fumes must not accumulate in the workspace.
- Fireproof surroundings: The forge should sit away from flammable surfaces, stored fuel, solvents and clutter.
- Repeatability: Beginners learn faster when they can reproduce similar heats instead of constantly fighting the fire.
ABANA’s educational material places safety at the start of beginner instruction before moving into controlled forging skills such as tapering, bending, punching and heat treatment. That sequence is practical for any small shop: heat control is a tool skill, not just a feature of the forge.
Anvils, hammers and tongs are the working triangle
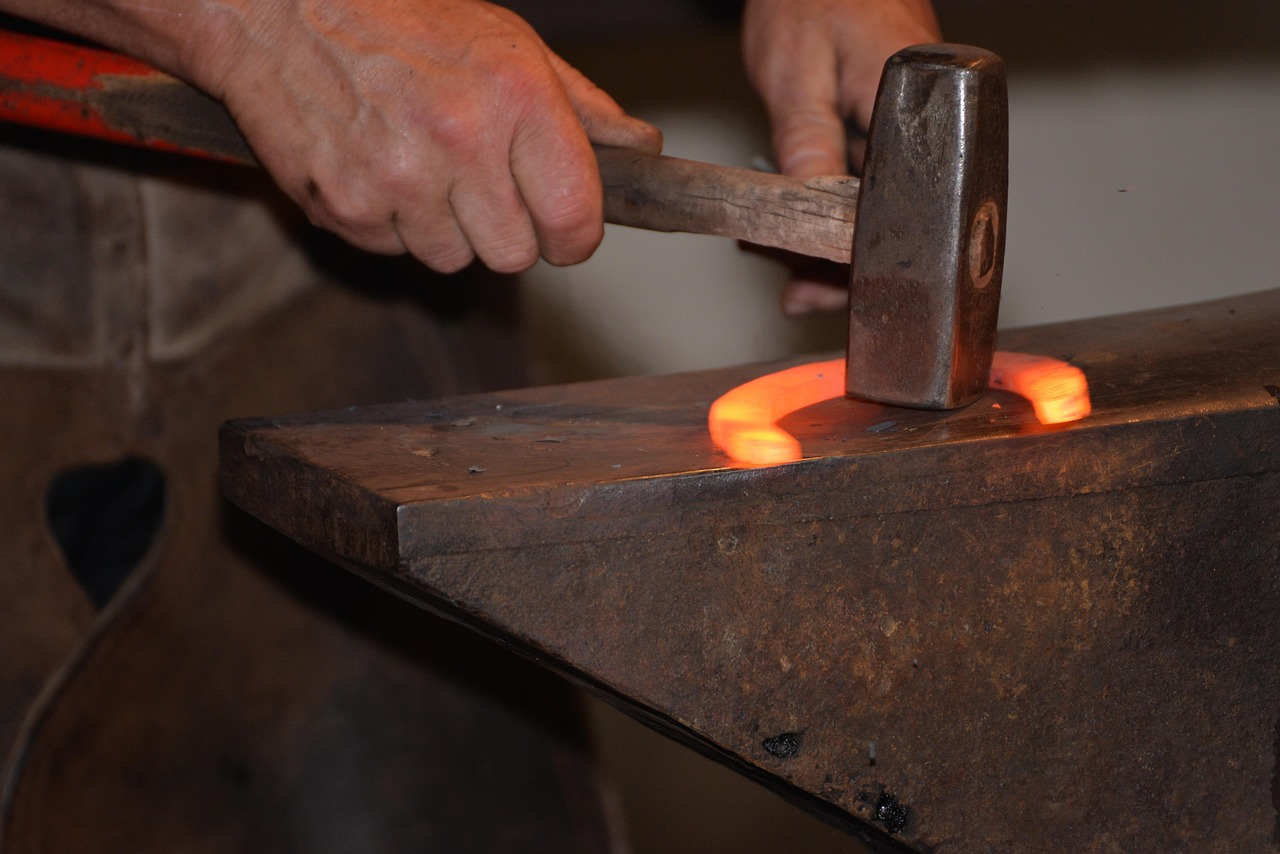
The anvil, hammer and tongs form the working triangle of hand forging. When these three tools match the work, the smith can move metal efficiently with less fatigue and fewer mistakes. When they are poorly matched, the shop becomes noisier, slower and less safe.
Anvils and striking surfaces
A traditional anvil gives the smith a flat face, usable edges, a horn, and holes for hardy and pritchel work. For a beginner, the main considerations are mass, stability, rebound and a clean working surface. A lighter anvil can still be useful if it is mounted solidly. An unstable anvil, however, wastes energy and encourages poor hammer technique.
Some beginners use an anvil substitute, such as a section of heavy steel, while learning. That can work for basic practice if the surface is secure and appropriate for striking. Improvised tools should not introduce hazards such as tipping, sharp damaged edges or brittle unknown material. The goal is not to own a showpiece; it is to create a predictable surface that returns hammer energy into the work.
Choosing a hammer
A first forging hammer should be comfortable enough to control through repeated blows. Many beginners do better with a moderate hammer than with a heavy one. Too much weight can slow accuracy, strain the wrist and shoulder, and make clean hammer placement harder to learn. Cross-peen, ball-peen and rounding hammers can all be useful, but the exact pattern matters less at the start than control, balance and a handle that fits the user.
The hammer face should be dressed so it does not mark the work unintentionally. Sharp corners on a hammer face can leave deep dents in hot steel. Slightly radiused edges help the smith move metal while reducing accidental cuts in the workpiece.
Tongs and safe grip
Tongs are not just pliers for hot metal. They are workholding tools shaped for specific stock sizes and profiles. Flat jaw tongs, bolt tongs, box jaw tongs, wolf jaw tongs and scrolling tongs all grip differently. A poor tong fit can twist, slip or eject hot material when struck.
A beginner can often start with one versatile pair, then add patterns as projects require. The key is to match the jaws to the material. If a shop mostly works square bar, the tongs should hold square bar securely. If it works flat bar, round rod or scrollwork, different jaws may be safer. Many smiths eventually forge or modify their own tongs, but one reliable pair at the start reduces frustration and risk.
Cutting, punching, bending and measuring tools
Once the basic forge-anvil-hammer-tongs setup is working, the next level of blacksmith tools expands control. These tools help the smith divide material, create holes, form shoulders, bend accurately and repeat dimensions.
Chisels, hot cuts and hardy tools
Hot cuts and chisels separate material when saws or abrasive tools are not the best choice. A handled hot cut, a hardy hot cut in the anvil, or a struck chisel can all be appropriate depending on the task. Cutting hot steel requires attention to the tool edge and to the surface beneath the work. Cutting directly into the anvil face can damage both the tool and the anvil.
Hardy tools fit into the anvil’s hardy hole and act as bottom tools. They can cut, bend, fuller, swage or support work. They are useful, but they are not all first-day purchases. A hot cut hardy, a simple bending fork and a fuller are common early additions because they support frequent operations.
Punches, drifts and handled tools
Punches create holes or indentations; drifts enlarge and shape holes after punching. This matters for hardware, hooks, hinges, tools and joinery. Punching is also a useful skill test because it combines heat control, accurate striking and support over the pritchel hole or another safe relief area.
Handled top tools can improve control when two people are working together, but beginners should be cautious. Struck tools require communication, eye protection and clear positioning. If the shop uses a striker, both people need to understand the command rhythm before the first blow lands.
Layout and measuring tools
Blacksmithing is often described as freeform, but good work still depends on measurement. A steel rule, dividers, calipers, square, soapstone or marking pencil, center punch and simple story stick can improve consistency. For repeated hooks, brackets or hardware, a physical template may be more useful than remeasuring every piece from scratch. See also: Bolts & Fasteners.
Measuring tools also reduce waste. When a smith understands starting length, taper allowance and bend location, fewer pieces end up too short, uneven or unusable. This is one reason structured blacksmith education emphasizes forging to dimension rather than only making visually acceptable shapes.
Power tools in a blacksmith shop
Power tools are not a substitute for hammer control, but they can save time and improve repeatability when used correctly. Common power tools in small blacksmith shops include angle grinders, drill presses, belt grinders, chop saws, power hammers and hydraulic presses. Each one changes the workflow. Each one also adds requirements for guarding, dust control, noise management, maintenance and training.
An angle grinder is often the first power tool added because it can cut, grind, clean scale and prepare surfaces. It is also one of the tools most likely to be misused. Wheel rating, guard position, body stance, and eye and face protection all matter. OSHA guidance for portable power tools emphasizes guarding and eye protection where flying particles may create a hazard. In a blacksmith shop, that warning is directly relevant because grinding scale, cutting discs and wire wheels can all throw debris.
Belt grinders and finishing
A belt grinder can shape edges, clean forged surfaces and refine tools after heat treatment. It is especially useful for toolmaking and bladesmithing, but it should not become a crutch for poor forging. Removing large amounts of steel by grinding is slower and more wasteful than forging close to shape first.
Power hammers and presses
Power hammers and hydraulic presses move metal faster than hand hammers. They are useful for larger stock, production work, pattern welding and heavy drawing operations. They also require stronger foundations, safe controls and greater awareness of pinch points. A small shop should add this equipment only when the volume and type of work justify it.
For many beginners, the smarter early investment is not a large machine. It is a stable anvil stand, better tongs, appropriate ventilation, a fire-resistant layout and high-quality protective equipment. Those upgrades improve every forging session.
Safety gear belongs on the tool list
Safety equipment should be treated as part of the blacksmith tool set, not as an optional accessory. Forging combines radiant heat, scale, sparks, sharp edges, fuel, heavy objects and repetitive impact. The most basic protection includes safety glasses, hearing protection, natural-fiber clothing, leather footwear and gloves used with judgment.
Eye protection is especially important. Modern eye and face protection standards, including ANSI/ISEA Z87.1, address protectors for occupational and educational settings. For blacksmithing, the practical takeaway is straightforward: use impact-rated eye protection suitable for shop hazards, and add a face shield when grinding, wire brushing or doing work that may throw fragments. A face shield does not replace safety glasses; it adds coverage.
- Eyes: Wear impact-rated safety glasses in the shop and add a face shield for grinding or high-debris work.
- Hearing: Use hearing protection when hammering, grinding or running loud equipment.
- Clothing: Choose cotton, wool or leather instead of synthetic fabrics that can melt.
- Hands: Use gloves when appropriate, but avoid loose gloves near rotating machinery.
- Feet: Wear leather boots that protect against hot scale and dropped stock.
- Fire control: Keep extinguishing equipment accessible and maintain a clean, nonflammable forge area.
Good safety practice also includes tool inspection. Loose hammer heads, cracked handles, mushroomed struck tools, damaged grinder wheels and unstable stands should be fixed before work begins. In a shop built around impact, heat and leverage, maintenance is prevention.
How to build a tool set without overspending
The most common buying mistake is purchasing specialty tools before understanding the work. A wall of tongs looks impressive, but a beginner may use only two or three pairs regularly. The same applies to decorative stamps, swages, spring fullers and jigs. These tools are valuable when they solve a real production or design problem. Before that, they can drain the budget and distract from core skills.
- Start with the heat-work-hold-strike basics. Forge, anvil, hammer, tongs and safety gear come first.
- Add a vise and measuring tools early. They improve control and repeatability across many projects.
- Buy or make tools for actual projects. Let hooks, punches, leaves, brackets or tools reveal what is missing.
- Upgrade weak links before adding luxuries. A better anvil stand may help more than another hammer.
- Keep tools visible and organized. Time lost searching for hot work tools can become a safety problem.
A practical starter path might begin with small hooks and tapers, then move to punches, drifts, simple chisels and tongs. That progression has a built-in advantage: the smith learns to make tools while learning to use them. Toolmaking is not just a way to save money; it teaches heat control, proportion, striking accuracy and finishing discipline.
Frequently asked questions
What are the most important blacksmith tools for a beginner?
The most important tools are a forge, anvil or solid striking surface, hammer, tongs, vise, measuring tools and personal protective equipment. Cutting tools, punches, drifts and hardy tools come next as projects become more complex.
Can I start blacksmithing without a traditional anvil?
It is possible to practice basic forging on a secure heavy steel block or other suitable anvil substitute, but stability and material quality matter. A substitute should not tip, chip, crack or damage tools. A proper anvil becomes more useful as accuracy and project complexity increase.
How many hammers does a small blacksmith shop need?
A small shop can begin with one well-balanced forging hammer. Additional hammer shapes are useful later for drawing, finishing and specialty work, but control is more important than owning many hammers early.
Are power tools necessary for blacksmithing?
No. Traditional forging can be done with hand tools, but power tools such as angle grinders, drill presses and belt grinders can speed cutting, cleanup and finishing. They should be added with proper guarding, eye protection, hearing protection and training.
Should beginners buy or make their own tongs?
Many beginners benefit from buying one reliable pair of tongs that fits the stock they use most. After basic hammer control improves, making tongs is a valuable learning project and helps expand the shop’s tool range.
Final takeaway
The best blacksmith tools for a beginner or small workshop are the ones that support safe, repeatable control of hot metal. Start with the core system: forge, anvil, hammer, tongs, vise, measuring tools and protective equipment. Add cutting, punching, bending and power tools only when they solve a clear problem. A careful, staged tool set will teach more than a crowded shop, and it will leave room for the most important blacksmithing skill of all: learning how steel moves under heat and hammer.


