Plastering tools list for drywall finishing, skim coats, and repairs
What plastering tools need to do
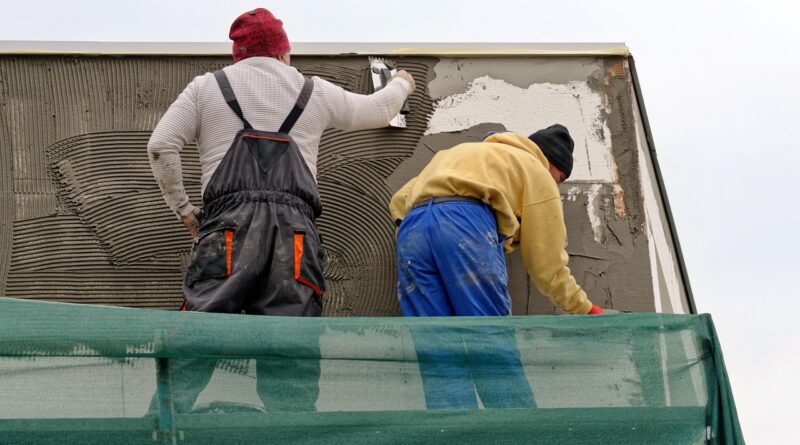
Plastering tools do more than spread material on a wall. A workable kit has to support the full job sequence: measuring, mixing, carrying, applying, flattening, finishing, cleaning, and inspecting the surface. For small repairs, that may mean a bucket, margin trowel, hawk, finishing trowel, and taping knife. For full-wall skim coats or gypsum board finishing, the kit usually expands to include straightedges, corner tools, sanding equipment, and a drill mixer.
The right choice depends on the substrate, the plaster or joint compound being used, the required finish level, and the user’s experience. This guide groups the main plastering tools by job stage, so readers can build a practical kit instead of buying every tool on the shelf. For related equipment guides, visit the Tools & Power section.
The core plastering tool kit
A starter plastering kit should cover preparation through cleanup. Some tools appear on almost every job; others are only needed for corners, ceilings, decorative finishes, or larger areas.
| Tool | Main use | Typical role in the workflow |
|---|---|---|
| Mixing bucket | Holding water, plaster, or joint compound | Mixing and cleanup |
| Paddle mixer or mixing drill | Combining powder and water evenly | Preparation before application |
| Bucket trowel | Scooping material from the bucket | Loading the hawk or tray |
| Plasterer’s hawk | Holding a workable amount of plaster | Application at the wall or ceiling |
| Finishing trowel | Applying, flattening, and polishing plaster | Main application and finish tool |
| Margin trowel | Working in tight spaces and cleaning bucket edges | Detailing and small repairs |
| Darby or straightedge | Leveling larger surfaces | Flattening base coats or render |
| Float | Texturing, leveling, or finishing certain coats | Intermediate or final surface work |
| Taping knife | Spreading joint compound over seams and patches | Drywall finishing and repair |
| Sanding block or pole sander | Smoothing dried compound | Final correction before decoration |
The exact list changes with the material. Traditional plaster, veneer plaster, cement render, lime plaster, and drywall joint compound all handle differently. A tool that works well for a broad drywall patch may not suit a thick base coat or an exterior render.
Mixing and preparation tools
Many finish problems start before the first pass on the wall. Lumps, inconsistent water ratios, dirty buckets, and poorly prepared surfaces can all show through later. A clean mixing bucket is essential because hardened debris from an old batch can drag through fresh plaster and leave marks.
A paddle mixer helps with larger batches, but it should match the material and container size. High-speed mixing can introduce air or throw material from the bucket. Under-mixing can leave dry pockets. Product instructions should take priority because plasters and compounds vary in working time, water demand, and mixing method.
For loading by hand, a bucket trowel is usually more efficient than trying to scoop material with a finishing trowel. Its shape is made to reach inside the bucket and transfer material cleanly. A margin trowel is also useful for scraping bucket edges, working around outlets, and handling narrow repairs.
Preparation tools may include a utility knife, scraper, brush, vacuum, masking materials, corner bead tools, and measuring equipment. On gypsum panel work, finish expectations are often described through recognized levels of finish. Those levels take into account the final decoration, surface smoothness, lighting conditions, and whether the surface will receive paint, texture, or another treatment.
Application tools for walls, ceilings, and patches
The finishing trowel is the best-known plastering tool because it affects both application speed and surface quality. Stainless steel trowels resist corrosion and are common for finish work. Carbon steel trowels can develop a smooth working edge, but they need more care to prevent rust. Handle comfort also matters because plastering involves repeated wrist and forearm movement.
The hawk works as a portable platform. It holds a small amount of plaster close to the working area and reduces trips back to the bucket. Aluminum hawks are rigid and durable. Plastic or polyurethane hawks are lighter and may feel easier for occasional users. The best choice depends partly on preference, but balance and handle comfort should not be overlooked.
For large flat areas, a darby, featheredge, or straightedge helps show high and low spots that a small trowel may miss. These tools are especially relevant for base coats, render, and leveling work. A straightedge does not replace trowel control, but it gives a wider reference line and helps keep the wall plane consistent.
Patches and drywall repairs often need wide taping knives as well as, or instead of, a plastering trowel. A narrow knife loads material and fills the damaged area. Wider knives feather the compound outward so the repair blends into the surrounding surface. For gypsum board seams, the tool width typically increases across coats to reduce the visible edge of the repair.
Finishing tools and surface quality
Finishing is where tool condition becomes obvious. A clean trowel edge can leave a flatter surface with fewer ridges. A damaged, rusty, or dirty blade can mark the wall even when the plaster mix is correct. For that reason, experienced plasterers often keep finishing trowels away from rough scraping work and use separate tools for cleanup or demolition.
Floats are used differently depending on the material. A sponge float can help refine some sand-and-cement or textured finishes. A plastic float may be used for leveling and rubbing up certain surfaces. A steel trowel is usually associated with a smoother finish, but overworking some materials can cause surface tearing, excessive polishing, or weakened texture. The material manufacturer’s instructions should guide timing and technique.
Corner tools can speed up inside or outside corners, but they do not automatically create a better finish. They work best when the corner is already reasonably straight and the compound or plaster has the right consistency. For small repairs, a flexible taping knife may offer more control than a dedicated corner tool.
Lighting is also part of finishing. A work light held at a shallow angle can reveal ridges, tool marks, pinholes, and uneven feathering before paint makes them more visible. Critical lighting from windows or fixtures can exaggerate surface flaws, so inspection should take place before decoration.
Hand tools versus power tools
Most plastering tools are hand tools, but power tools are important for mixing, sanding, and surface preparation. A drill mixer saves labor on larger batches. A pole sander or powered drywall sander can reduce time on extensive drywall finishing. At the same time, power tools can create dust, noise, and control issues if they are used without planning.
For occasional repair work, hand sanding may be slower but easier to control. For large rooms, a vacuum-assisted drywall sander can help manage dust when used with compatible extraction equipment. Dust control is not only a housekeeping issue. Sanding compound, old coatings, and some substrates can create airborne particles that require suitable respiratory protection and cleanup practices. See also: Bolts & Fasteners.
Power tools should be used with guarded moving parts, intact cords, suitable plugs, and manufacturer-approved accessories. General workplace safety guidance for hand and power tools emphasizes guarding, maintenance, and correct operation. On any jobsite, local regulations, product safety sheets, and employer procedures should be followed.
How to choose plastering tools without overbuying
A sensible buying approach starts with the job, not the display rack. A homeowner repairing a few dents in drywall does not need the same kit as a tradesperson skimming full rooms. The practical questions are simple: what surface, what material, what area size, and what finish expectation?
For small drywall repairs
Choose a mixing tray or small bucket, margin trowel, 4 to 6 inch knife, wider finishing knife, sanding block, utility knife, and dust protection. A hawk is optional for very small repairs, but it becomes helpful when working with more material.
For skim coating interior walls
A finishing trowel, hawk, bucket trowel, clean buckets, paddle mixer, wide knives, sanding tools, and inspection light become more important. Consistency across the whole wall matters more than speed.
For base coats or render
Add straightedges, darbies, floats, levels, and stronger preparation tools. Larger surfaces need better control of flatness, thickness, and timing.
Tool quality matters most where the tool touches the final surface. A well-made finishing trowel, straight blade, and comfortable handle can improve control. For less sensitive tasks such as scooping, scraping, or rough preparation, durability may matter more than precision.
Cleaning, storage, and maintenance
Plastering tools should be cleaned before material hardens. Dried plaster or compound on a trowel edge can scratch the next surface and shorten the tool’s life. Keep a separate clean water bucket when finishing, and avoid washing heavy residues into drains unless local disposal rules and product instructions allow it.
Steel tools should be dried before storage. Carbon steel blades may need light oiling if they will be stored for a long period. Stainless steel still benefits from dry storage and edge protection. Hawks, floats, and buckets should be checked for hardened ridges because even small pieces can contaminate a fresh batch.
Do not use a premium finishing trowel as a scraper, pry bar, or bucket cleaner. Keeping rough tools and finish tools separate is one of the simplest ways to protect surface quality. A small tool roll or dedicated box also helps prevent blade edges from being damaged by heavier equipment.
Frequently asked questions
What are the most essential plastering tools for beginners?
For basic interior work, start with clean buckets, a bucket trowel, hawk, finishing trowel, margin trowel, taping knives, sanding tools, and an inspection light. Add straightedges, floats, and corner tools only when the project requires them.
Is a plastering trowel the same as a float?
No. A plastering trowel is usually a metal-bladed tool used to apply and smooth material. A float is commonly used for leveling, rubbing up, texturing, or finishing certain surfaces, depending on the material and finish.
Do I need power tools for plastering?
Not always. Small repairs can often be done with hand tools. Power tools become more useful for larger batches, broad sanding work, or repeated professional use, but they require dust control and safe handling.
Why do plastering tools leave lines on the wall?
Lines can come from a damaged blade, dried debris, excessive pressure, poor timing, inconsistent mix, or an uneven substrate. Clean tools and controlled passes usually reduce marks, but surface preparation and material timing are just as important.
Can one tool kit handle plastering and drywall finishing?
Some tools overlap, including buckets, taping knives, margin trowels, sanding tools, and lights. Traditional plastering and rendering often require additional trowels, hawks, floats, and straightedges, while drywall finishing relies more heavily on knives and feathering techniques.


